

Overview
specklepy uses personal access tokens to authenticate with Speckle Server.Tokens are managed through your Speckle Server profile and can be scoped to limit permissions.
Get a Personal Access Token
1
Log into Speckle
Go to your Speckle Server (e.g., app.speckle.systems)
2
Access Your Profile
Click your avatar → Settings → Profile → Developer → Access Tokens
3
Create Token
Click “New Token”, give it a name and select the required scopes, then copy the token.
Token-Based Authentication
The primary way to authenticate:Use Environment Variables (Recommended)
Best practice for all environments:- Python (.env file)
- Linux/macOS
- Windows (PowerShell)
- Windows (Command Prompt)
Using Create Load in your script:
python-dotenv:.env file:Local Account Files (Optional)
For local development, you can use account credentials stored by Speckle desktop connectors:Local accounts are created by signing in and authenticating with any Speckle desktop connector (Revit, Rhino, Grasshopper, AutoCAD, etc.).Account files are stored in:
- Windows:
%APPDATA%\Speckle\Accounts - macOS:
~/.config/Speckle/Accounts - Linux:
~/.local/share/Speckle/Accounts
Account Object Structure
AnAccount object contains:
Different Speckle Servers
Connect to Different Servers
SSL Certificate Verification
For self-hosted servers with self-signed certificates:Authentication Best Practices
Choose the authentication method that best fits your use case:- Development
- Production
- CI/CD
- Multi-User Apps
Use environment variables or local accounts:Store tokens in
.env files (not committed to git) or use local account files.Checking Authentication Status
Verify your client is authenticated:Token Scopes
When creating a token, you can limit its permissions:
Scopes will be documented later but for now you can view all those available in the Access Token creation step:
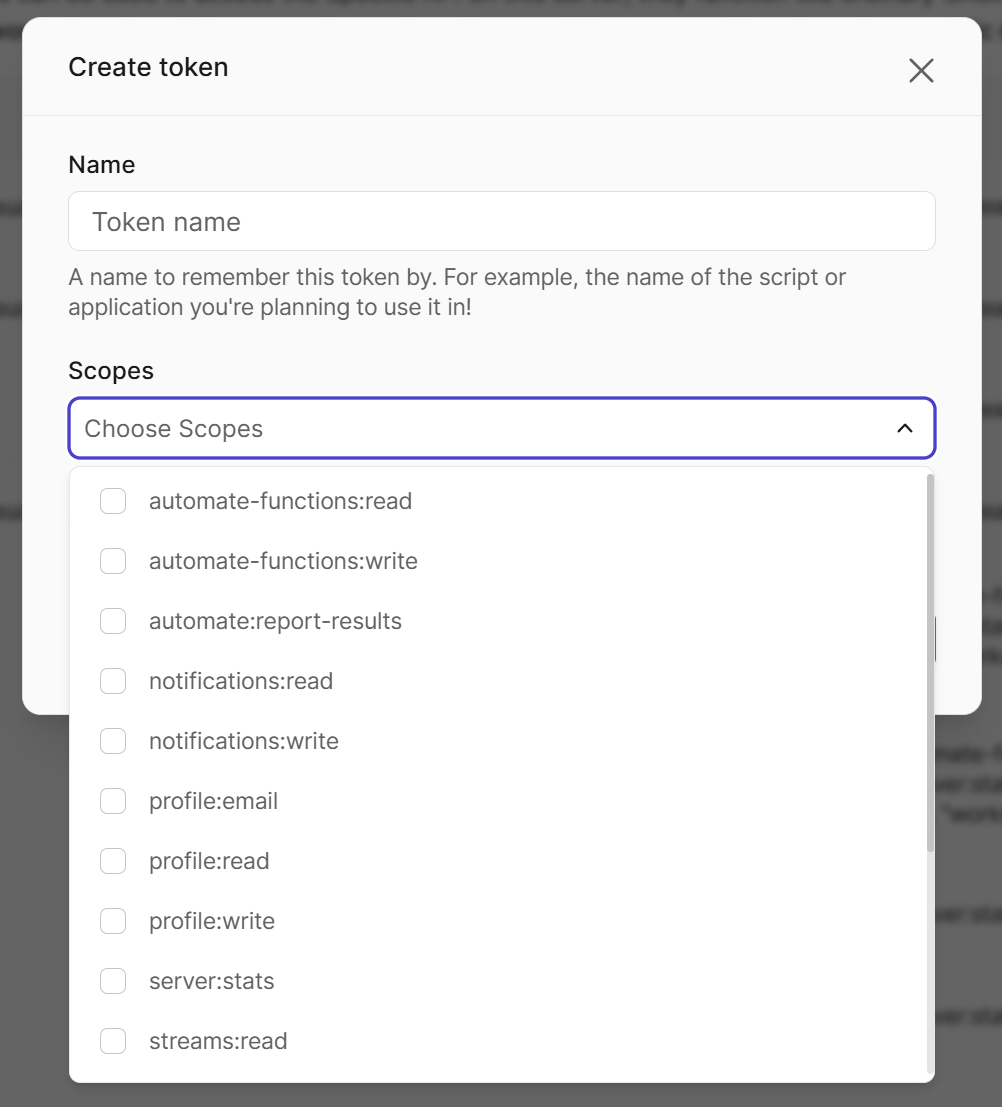
Scopes retain the nomenclature of v2 Speckle where
project is streamCommon Authentication Errors
Invalid Token
Invalid Token
Error:
403 Forbidden or Invalid tokenSolution:- Verify the token is correct (no extra spaces)
- Check the token hasn’t been revoked
- Ensure the token has the required scopes
- Generate a new token if needed
Connection Refused
Connection Refused
Error:
Connection refused or Failed to connectSolution:- Verify the server URL is correct
- Check your internet connection
- For local servers, ensure the server is running
- Check firewall settings
SSL Certificate Error
SSL Certificate Error
Error:
SSL: CERTIFICATE_VERIFY_FAILEDSolution:- For self-signed certificates, use
verify_certificate=False - Install the certificate in your system’s trust store
- For production, use properly signed certificates
No Local Accounts Found
No Local Accounts Found
Error:
No default account foundSolution:- Use token authentication instead:
Security Best Practices
Do: - Store tokens in environment variables - Use
.gitignore to exclude .env files - Rotate
tokens periodically - Use scoped tokens with minimal permissions - Revoke tokens when no longer
neededNext Steps
Now that you’re authenticated, start sending and receiving data:Quickstart
Build your first Speckle integration
Core Concepts
Understand Projects, Models, and Versions